
ARIN Region
The American Registry for Internet Numbers (ARIN) serves the following regions:
- U.S.
- Canada
- Bermuda
- Caribbean (English speaking side)
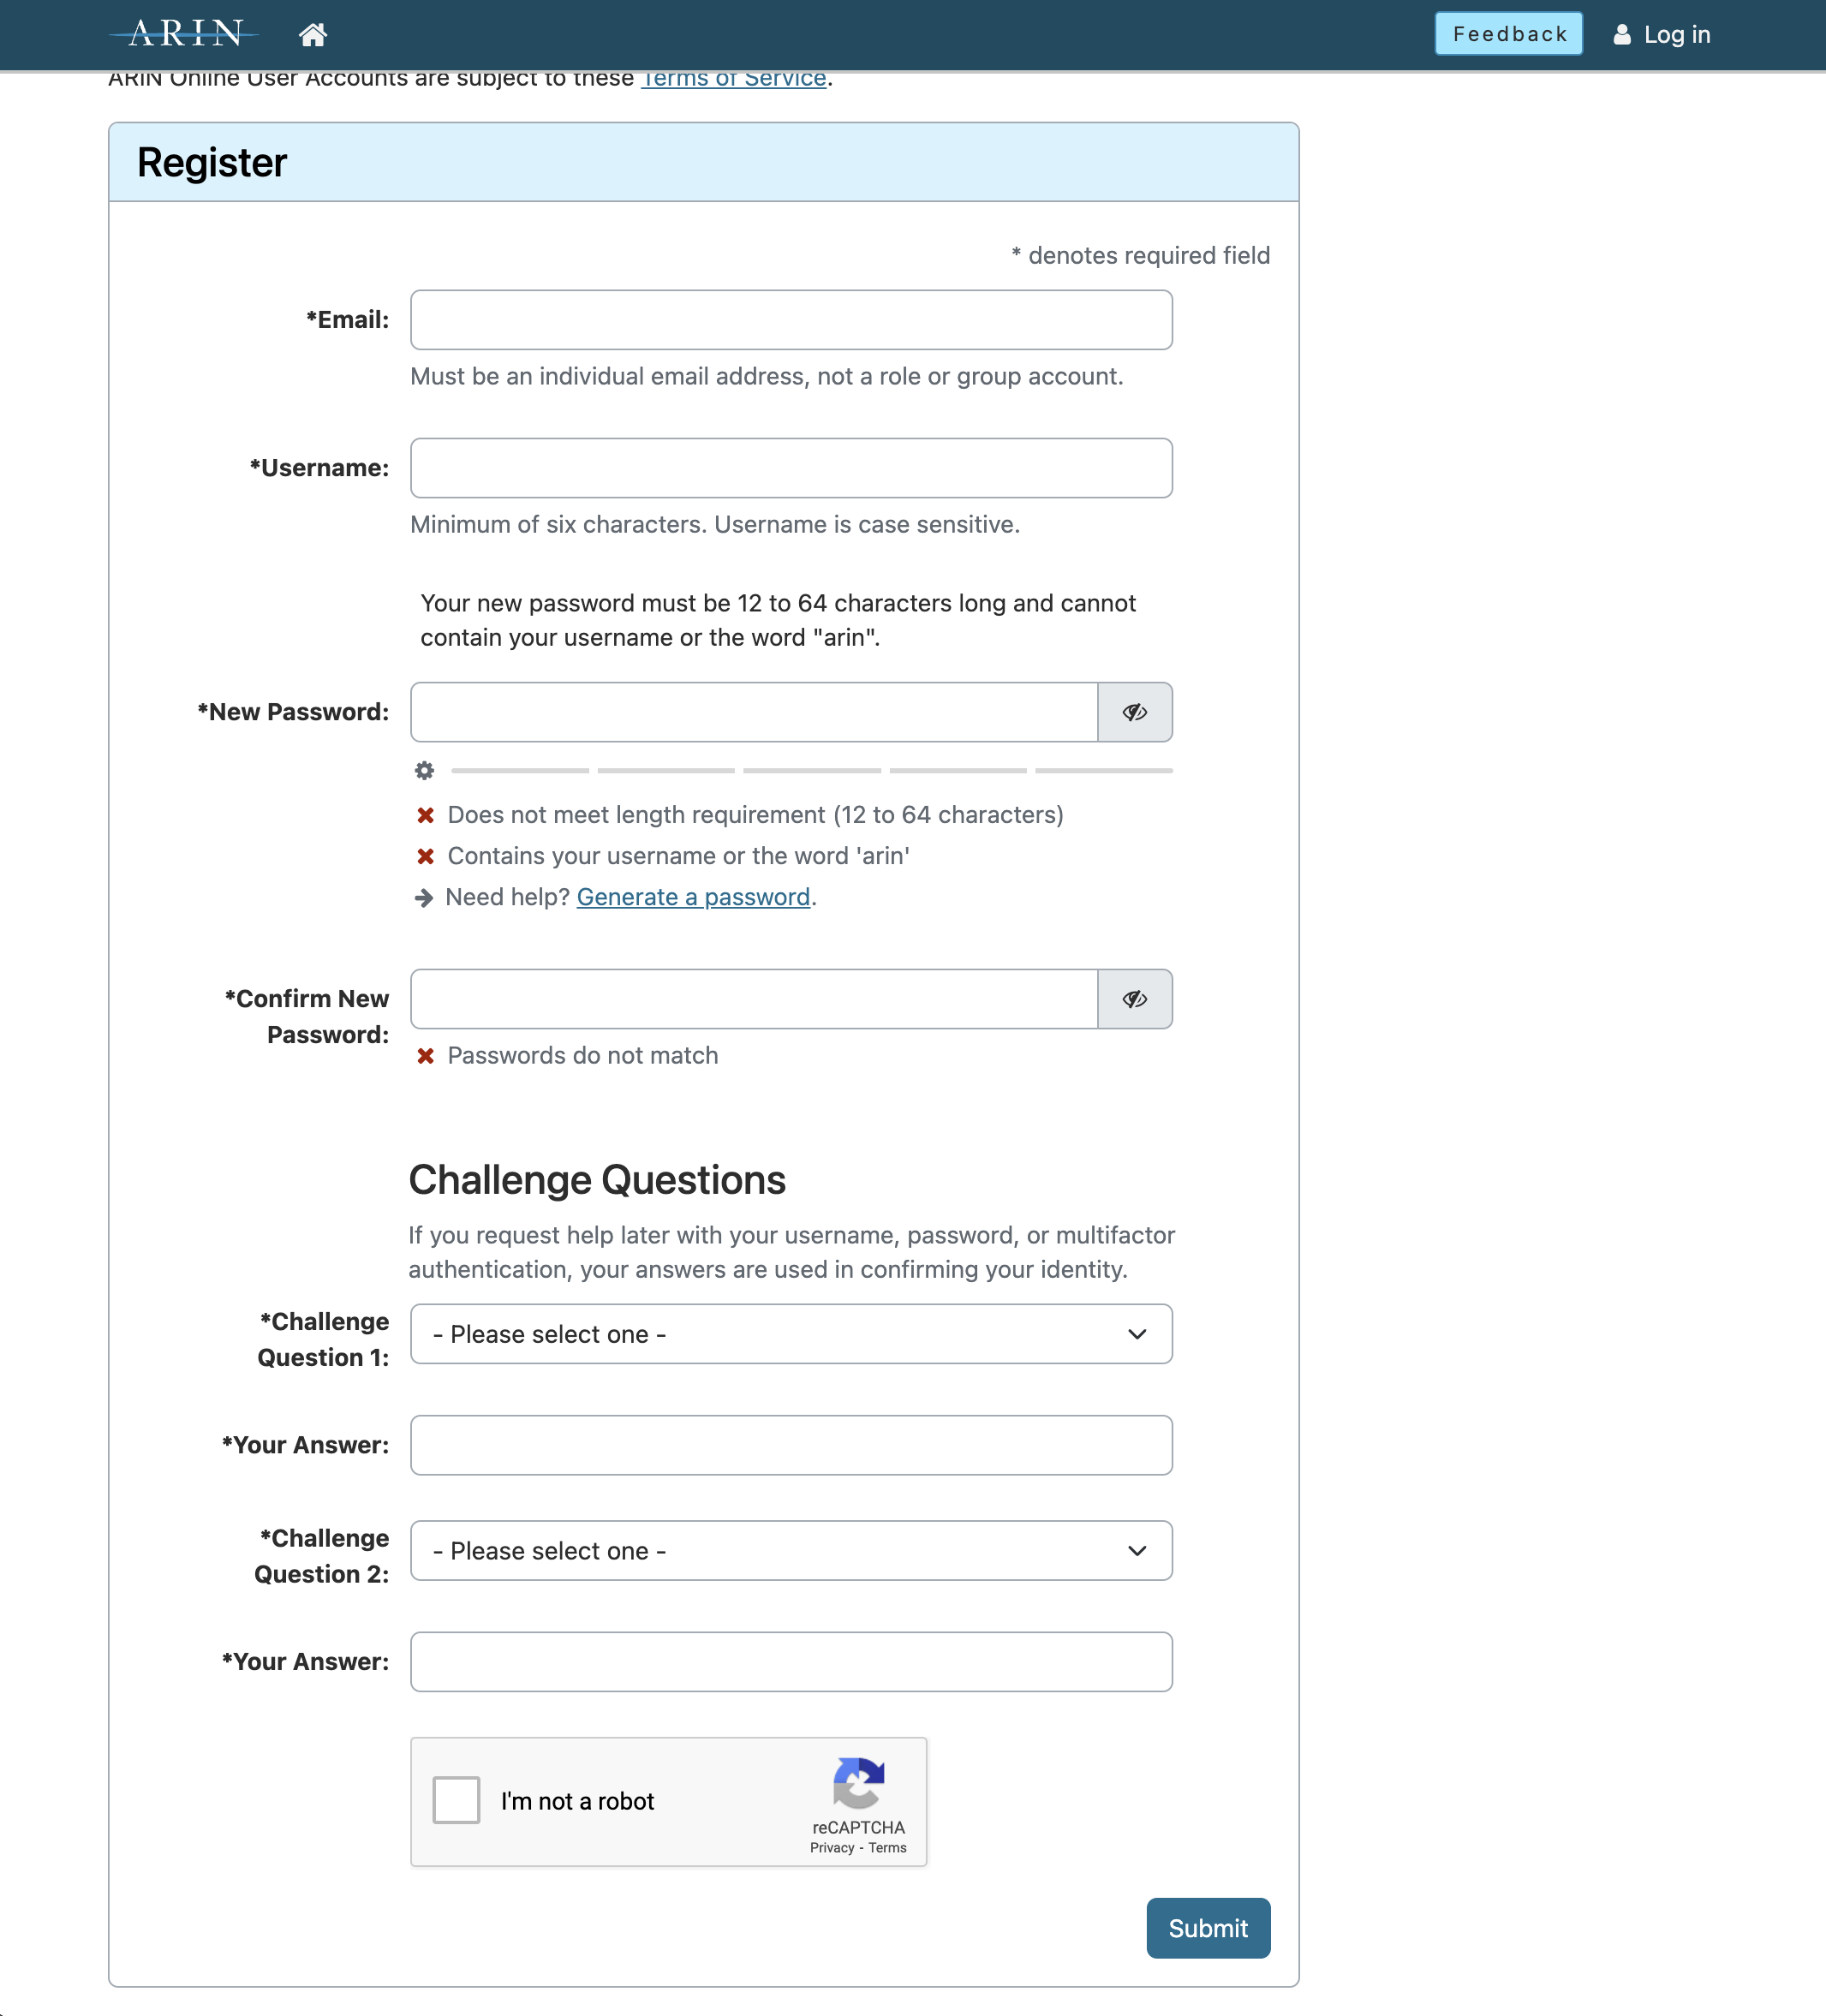
Step 1: Setup Your ARIN Online Account
Go to https://account.arin.net/public/account-setup
Enter your email, username, password and security questions then click Submit
Validate your email using the link in your email
Step 2: Create Point of Contact Records (POC)
In your dashboard click "Your Records" -> "Point of Contact Records" or
Go to https://account.arin.net/public/secure/poc
- Click "Create POC"
- Select the Contact Type, Fill the inputs and write a valid email address. (It's recommended to create 3 or more POCs, 1. Admin, 2. Tech, 3. Abuse, however you can create just one poc and use the same person in every section)

Step 3: Create an Organization Identifier (ORG)
In your dashboard click "Your Records" -> "Organization Identifiers" or
Go to https://account.arin.net/public/secure/org
- Click "Create Org ID"
- Fill the inputs with your company details, then click "Next Step" button.
- Select "Admin", "Tech", "Abuse" persons, you can select the optional persons too, it's up to you.
- Click "Next Step".

If you have comments, write it to the "Public Comments" section, but don't forget this is not something that you are writing to ARIN team, it's for public records.
Add your company registration papers that shows the company is valid and you are the authorized person
Click "Submit"

After the submitting form, the system will create a Ticket automatically you can track your request status on that ticket's page.
Once it's approved, ARIN will request an officer of your company to sign the Registration Services Agreement (RSA).
Step 4: Request Pre-Approval for IP Addresses
ARIN requires organizations to demonstrate their need for IP address space. To request pre-approval:
- In ARIN Online, go to Your Records > Organization Identifiers.
- Click your Org Handle (which is the same as the Org ID).
- On the right, click Actions, then choose Request Transfer Pre-Approval.
ARIN will request details about:
- Your current address space usage.
- How the address space is used.
- Projections showing why additional space is needed. For guidance, see examples here.
An officer must sign an attestation confirming the truthfulness of the provided information to prevent hoarding. ARIN charges a fee of a few hundred dollars for this step. Once pre-approved, you can purchase addresses, but save the pre-approval ticket number to include in your transfer request later.
Step 5: Sign the Services Agreement and Pay Fees
Even after ARIN approves the transfer, it is not complete until you:
- Sign a Services Agreement.
- Pay the required fees.
Be sure to review ARIN's fee schedule for the most up-to-date costs associated with memberships and resource transfers.